[gelöst] Desktop am ThinkPad Stammtisch teilen - meine Lösung ist Jitsi Meet - Screensharing

RDP kann zumindest in der "normalen" Version nur 1 Benutzer gleichzeitig.
Korrekt, deswegen hätte ich auf Anhieb erst mal zu VNC tendiert... aber wenn das schon zu viel Aufwand ist weiß ich ehrlich gesagt auch nicht weiter :p

Ich lese weiterhin einfach gespannt mit und versuche mir zusammen zu reimen, wieso hier lieber eine selbst gehostete Videokonferenzlösung zum Einsatz kommen soll... vielleicht lerne ich ja noch was :)
 
Zumindest als Client ist es "mehr" Aufwand gegenüber einem Browser und URL eingeben.
 
@elektrokid
Wie weit bist Du mit dem anschauen?

Nutzt Du Docker?

Mein Jitsi Release stable-8319.tar.gz
Code:
https://github.com/jitsi/docker-jitsi-meet/archive/refs/tags/stable-8319.tar.gz

.env
Code:
# shellcheck disable=SC2034

################################################################################
################################################################################
# Welcome to the Jitsi Meet Docker setup!
#
# This sample .env file contains some basic options to get you started.
# The full options reference can be found here:
# https://jitsi.github.io/handbook/docs/devops-guide/devops-guide-docker
################################################################################
################################################################################


#
# Basic configuration options
#

# Directory where all configuration will be stored
CONFIG=~/.jitsi-meet-cfg

# Exposed HTTP port
HTTP_PORT=8000

# Exposed HTTPS port
HTTPS_PORT=8443

# System time zone
TZ=UTC

# Public URL for the web service (required)
#PUBLIC_URL=https://meet.example.com
PUBLIC_URL=https://192.168.178.136:8443

Wie bekomme ich ein lokales ssl Zertifikat bei der Docker Lösung?

Die folgende verlinkte Lösung verstehe ich nicht https://community.jitsi.org/t/ssl-in-jitsi-docker/22686

Stefanie sagt - HTTPS mit Docker in lokaler Entwicklungsumgebung
https://blog.stefaniedrost.com/https-mit-docker-in-lokaler-entwicklungsumgebung/
 
Zuletzt bearbeitet:
Nur selbst-signiert oder gekauft.
Die dritte Alternamive, Letsencrypt, setzt eine Internetverbindung mit eingehenden Ports 80 und 443 in deine Docker-Instanz voraus, wozu auch eine Domain registriert und die Instanz z.B. über DynDNS zum Zeitpunkt der Zertifikatserstellung und -verlängerung von außen erreichbar sein muss.
 
Internet habe ich nicht, ist die Lösung von Stefanie praktikabel?

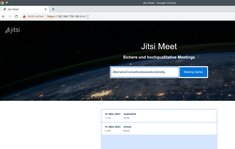
2023_03_19_121332_Screenshot.jpg
 
Wäre zu einfach 🙃

Wäre auch als Freeware mittels rustdesk einfach realisierbar.
Stimmt, wenn man bei rustdesk kein Adressbuch braucht, ist das auch eine nette Lösung, wobei: Für Screensharing?

@elektrokid
Wie weit bist Du mit dem anschauen?

Nutzt Du Docker?

Ich hatte noch keine Zeit zum schauen. Docker ist mittlerweile ein echt guter Begleiter geworden. Braucht es für den lokalen Betrieb ein Zertifikat? Ihr könnt doch ohne SSL über den 80er gehen.
 
Diese Meldung bekommst Du nur mit einem gültigen, signierten Zertifikat weg - siehe mein Beitrag oben.

Solange Du nur innerhalb eines privaten Netzwerk Jitsi Meet einsetzt, brauchst Du kein signiertes Zertifikat. Andoid und IOS sollten auch ein selbst-signiertes Zertifikat akzeptieren, wenn die Sitzung mit dem Hostnamen statt der IP-Adresse aufgerufen wird.
 
Wie bekomme ich die "Nicht sicher" Meldung in lokalen Netzwerk weg?

Dann mache ich mal was Stefanie sagt:

Bei selbst-signierten Zertifikaten spielen oft die Browser nicht mit und zeigen trotz Zertifikat eine unsichere Verbindung und demnach ein rotes Schlosssymbol an. Wie ihr das lösen könnt, habe ich euch in den folgenden 7 Schritten erläutert.


  1. Ordner für SSL Keys anlegen
  2. eigene Certificate Authority erstellen
  3. Zertifizierungsstelle im Browser hinterlegen
  4. Self Signed Key anlegen mit entsprechender Domain
  5. Domain unter /etc/hosts einfügen
  6. Datei docker-compose.yml anpassen
  7. Nginx Konfiguration anpassen

"Zertifizierungsstelle im Browser hinterlegen", das wird die Anzeige bei den Teilnehmern vermutlich nicht lösen.

Wie baue ich ein Letsencrypt Zertifikat lokal in mein Jitsi Docker System ein?
Temporär kann ich Internet aktivieren.

Schon wieder ein Probleme, eine IP-Adresse kann kein Letsencrypt Zertifikat bekommen.
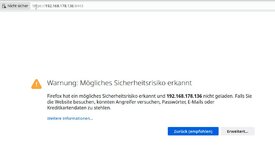
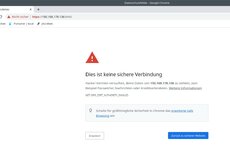
Und nun, keine Chance lokal ohne Sicherheitshinweis für die anderen Stammtischteilnehmer?

Bei Firefox
2023_03_19_130422_Screenshot.jpg

Bei Google Chrome
2023_03_19_130907_Screenshot.jpg
 
Zuletzt bearbeitet:
Wann liest Du endlich mal die Antworten?

Wie bekomme ich die "Nicht sicher" Meldung in lokalen Netzwerk weg?
Diese Meldung bekommst Du nur mit einem gültigen, signierten Zertifikat weg
Schon wieder ein Probleme, eine IP-Adresse kann kein Letsencrypt Zertifikat bekommen.
Letsencrypt, setzt eine Internetverbindung mit eingehenden Ports 80 und 443 in deine Docker-Instanz voraus, wozu auch eine Domain registriert und die Instanz z.B. über DynDNS zum Zeitpunkt der Zertifikatserstellung und -verlängerung von außen erreichbar sein muss.
 
Wieso bekomme ich bei meiner Fritz!Box, die nicht am Internet anschlossen ist diese Sicherheitsmeldung nicht?

Das OpenMediaVault NAS teste ich gerade beim ersten Login, Browsercache gelöscht.

Ergebnis:
2023_03_19_134820_Screenshot.jpg

Das funktioniert auch mit Android mit OMV.

Letsencrypt, setzt eine Internetverbindung mit eingehenden Ports 80 und 443 in deine Docker-Instanz voraus, wozu auch eine Domain registriert und die Instanz z.B. über DynDNS zum Zeitpunkt der Zertifikatserstellung und -verlängerung von außen erreichbar sein muss.

Wie richte ich das temporär ein?
Mit der OMV Darsellung in der Browserzeile wäre ich schon zufrieden.

Wie hat das OpenMediavault realisiert?

Code:
http://192.168.178.21/

Wie stelle ich meinen Jitsi Docker Server aus http um?

Code:
sudo nano /opt/containers/jitsi/docker-jitsi-meet-stable-8319/.env

So weit bin ich:

2023_03_19_141502_Screenshot.jpg

Was muss ich ändern damit ich die ":8000" entfernen kann, Aufruf soll sein http://192.168.178.136/ ?
Beitrag automatisch zusammengeführt:

Code:
cat /opt/containers/jitsi/docker-jitsi-meet-stable-8319/.env
# shellcheck disable=SC2034

################################################################################
################################################################################
# Welcome to the Jitsi Meet Docker setup!
#
# This sample .env file contains some basic options to get you started.
# The full options reference can be found here:
# https://jitsi.github.io/handbook/docs/devops-guide/devops-guide-docker
################################################################################
################################################################################


#
# Basic configuration options
#

# Directory where all configuration will be stored
CONFIG=~/.jitsi-meet-cfg

# Exposed HTTP port
HTTP_PORT=8000

# Exposed HTTPS port
# HTTPS_PORT=8443

# System time zone
TZ=UTC

# Public URL for the web service (required)
#PUBLIC_URL=https://meet.example.com
PUBLIC_URL=http://192.168.178.136:8000


# Media IP addresses to advertise by the JVB
# This setting deprecates DOCKER_HOST_ADDRESS, and supports a comma separated list of IPs
# See the "Running behind NAT or on a LAN environment" section in the Handbook:
# https://jitsi.github.io/handbook/docs/devops-guide/devops-guide-docker#running-behind-nat-or-on-a-lan-environment
#JVB_ADVERTISE_IPS=192.168.1.1,1.2.3.4


#
# JaaS Components (beta)
# https://jaas.8x8.vc
#

# Enable JaaS Components (hosted Jigasi)
# NOTE: if Let's Encrypt is enabled a JaaS account will be automatically created, using the provided email in LETSENCRYPT_EMAIL
#ENABLE_JAAS_COMPONENTS=0

#
# Let's Encrypt configuration
#

# Enable Let's Encrypt certificate generation
#ENABLE_LETSENCRYPT=1

# Domain for which to generate the certificate
#LETSENCRYPT_DOMAIN=meet.example.com

# E-Mail for receiving important account notifications (mandatory)
#LETSENCRYPT_EMAIL=alice@atlanta.net

# Use the staging server (for avoiding rate limits while testing)
#LETSENCRYPT_USE_STAGING=1


#
# Etherpad integration (for document sharing)
#

# Set etherpad-lite URL in docker local network (uncomment to enable)
#ETHERPAD_URL_BASE=http://etherpad.meet.jitsi:9001

# Set etherpad-lite public URL, including /p/ pad path fragment (uncomment to enable)
#ETHERPAD_PUBLIC_URL=https://etherpad.my.domain/p/

# Name your etherpad instance!
ETHERPAD_TITLE=Video Chat

# The default text of a pad
ETHERPAD_DEFAULT_PAD_TEXT="Welcome to Web Chat!\n\n"

# Name of the skin for etherpad
ETHERPAD_SKIN_NAME=colibris

# Skin variants for etherpad
ETHERPAD_SKIN_VARIANTS="super-light-toolbar super-light-editor light-background full-width-editor"


#
# Basic Jigasi configuration options (needed for SIP gateway support)
#

# SIP URI for incoming / outgoing calls
#JIGASI_SIP_URI=test@sip2sip.info

# Password for the specified SIP account as a clear text
#JIGASI_SIP_PASSWORD=passw0rd

# SIP server (use the SIP account domain if in doubt)
#JIGASI_SIP_SERVER=sip2sip.info

# SIP server port
#JIGASI_SIP_PORT=5060

# SIP server transport
#JIGASI_SIP_TRANSPORT=UDP


#
# Authentication configuration (see handbook for details)
#

# Enable authentication
#ENABLE_AUTH=1

# Enable guest access
#ENABLE_GUESTS=1

# Select authentication type: internal, jwt, ldap or matrix
#AUTH_TYPE=internal

# JWT authentication
#

# Application identifier
#JWT_APP_ID=my_jitsi_app_id

# Application secret known only to your token generator
#JWT_APP_SECRET=my_jitsi_app_secret

# (Optional) Set asap_accepted_issuers as a comma separated list
#JWT_ACCEPTED_ISSUERS=my_web_client,my_app_client

# (Optional) Set asap_accepted_audiences as a comma separated list
#JWT_ACCEPTED_AUDIENCES=my_server1,my_server2

# LDAP authentication (for more information see the Cyrus SASL saslauthd.conf man page)
#

# LDAP url for connection
#LDAP_URL=ldaps://ldap.domain.com/

# LDAP base DN. Can be empty
#LDAP_BASE=DC=example,DC=domain,DC=com

# LDAP user DN. Do not specify this parameter for the anonymous bind
#LDAP_BINDDN=CN=binduser,OU=users,DC=example,DC=domain,DC=com

# LDAP user password. Do not specify this parameter for the anonymous bind
#LDAP_BINDPW=LdapUserPassw0rd

# LDAP filter. Tokens example:
# %1-9 - if the input key is user@mail.domain.com, then %1 is com, %2 is domain and %3 is mail
# %s - %s is replaced by the complete service string
# %r - %r is replaced by the complete realm string
#LDAP_FILTER=(sAMAccountName=%u)

# LDAP authentication method
#LDAP_AUTH_METHOD=bind

# LDAP version
#LDAP_VERSION=3

# LDAP TLS using
#LDAP_USE_TLS=1

# List of SSL/TLS ciphers to allow
#LDAP_TLS_CIPHERS=SECURE256:SECURE128:!AES-128-CBC:!ARCFOUR-128:!CAMELLIA-128-CBC:!3DES-CBC:!CAMELLIA-128-CBC

# Require and verify server certificate
#LDAP_TLS_CHECK_PEER=1

# Path to CA cert file. Used when server certificate verify is enabled
#LDAP_TLS_CACERT_FILE=/etc/ssl/certs/ca-certificates.crt

# Path to CA certs directory. Used when server certificate verify is enabled
#LDAP_TLS_CACERT_DIR=/etc/ssl/certs

# Wether to use starttls, implies LDAPv3 and requires ldap:// instead of ldaps://
# LDAP_START_TLS=1


#
# Security
#
# Set these to strong passwords to avoid intruders from impersonating a service account
# The service(s) won't start unless these are specified
# Running ./gen-passwords.sh will update .env with strong passwords
# You may skip the Jigasi and Jibri passwords if you are not using those
# DO NOT reuse passwords
#

# XMPP password for Jicofo client connections
JICOFO_AUTH_PASSWORD=664c809e6dc92f4f471555a51a2954b4

# XMPP password for JVB client connections
JVB_AUTH_PASSWORD=1b36e8a06b3a2c58953ec81dcec5f8a3

# XMPP password for Jigasi MUC client connections
JIGASI_XMPP_PASSWORD=7ef39746c50ad4fb5d2737949470d783

# XMPP recorder password for Jibri client connections
JIBRI_RECORDER_PASSWORD=ca6cdb45e55c3db9f53b740b9805e19f

# XMPP password for Jibri client connections
JIBRI_XMPP_PASSWORD=a0fa63cc66d3c9de778751fa4babcf9d

#
# Docker Compose options
#

# Container restart policy
#RESTART_POLICY=unless-stopped

# Jitsi image version (useful for local development)
#JITSI_IMAGE_VERSION=latest
Beitrag automatisch zusammengeführt:

Die Website ist nicht erreichbar​

192.168.178.136 hat die Verbindung abgelehnt.


Versuche Folgendes:
ERR_CONNECTION_REFUSED

Wie löse ich das Problem?

Code:
http://192.168.178.136:8000/

kann genutzt werden.
Beitrag automatisch zusammengeführt:

L https://community.jitsi.org/t/enable-http-redirect-when-using-docker/28182
L https://github.com/jitsi/docker-jitsi-meet/issues/1318
Beitrag automatisch zusammengeführt:

Bei Aufruf von http://192.168.178.136 -----Umleitung auf ----> http://192.168.178.136:8000/

Wie mache ich das?
Beitrag automatisch zusammengeführt:

Code:
docker container port  a4fbc5180924
80/tcp -> 0.0.0.0:8000
80/tcp -> [::]:8000
443/tcp -> 0.0.0.0:8443
443/tcp -> [::]:8443
 
Zuletzt bearbeitet:
An der "cp env.example .env", als .env sind anpassungen vorgenommen worden.

Code:
sudo nano /opt/containers/jitsi/docker-jitsi-meet-stable-8319/.env

Die .env funktioniert mit https://192.168.178.136:8443/ ---->

.env
Code:
# shellcheck disable=SC2034

################################################################################
################################################################################
# Welcome to the Jitsi Meet Docker setup!
#
# This sample .env file contains some basic options to get you started.
# The full options reference can be found here:
# https://jitsi.github.io/handbook/docs/devops-guide/devops-guide-docker
################################################################################
################################################################################


#
# Basic configuration options
#

# Directory where all configuration will be stored
CONFIG=~/.jitsi-meet-cfg

# Exposed HTTP port
HTTP_PORT=8000

# Exposed HTTPS port
HTTPS_PORT=8443

# System time zone
TZ=UTC

# Public URL for the web service (required)
#PUBLIC_URL=https://meet.example.com
PUBLIC_URL=https://192.168.178.136:8443
# Media IP addresses to advertise by the JVB
# This setting deprecates DOCKER_HOST_ADDRESS, and supports a comma separated list of IPs
# See the "Running behind NAT or on a LAN environment" section in the Handbook:
# https://jitsi.github.io/handbook/docs/devops-guide/devops-guide-docker#running-behind-nat-or-on-a-lan-environment
#JVB_ADVERTISE_IPS=192.168.1.1,1.2.3.4


#
# JaaS Components (beta)
# https://jaas.8x8.vc
#

# Enable JaaS Components (hosted Jigasi)
# NOTE: if Let's Encrypt is enabled a JaaS account will be automatically created, using the provided email in LETSENCRYPT_EMAIL
#ENABLE_JAAS_COMPONENTS=0

#
# Let's Encrypt configuration
#

# Enable Let's Encrypt certificate generation
#ENABLE_LETSENCRYPT=1

# Domain for which to generate the certificate
#LETSENCRYPT_DOMAIN=meet.example.com

# E-Mail for receiving important account notifications (mandatory)
#LETSENCRYPT_EMAIL=alice@atlanta.net

# Use the staging server (for avoiding rate limits while testing)
#LETSENCRYPT_USE_STAGING=1


#
# Etherpad integration (for document sharing)
#

# Set etherpad-lite URL in docker local network (uncomment to enable)
#ETHERPAD_URL_BASE=http://etherpad.meet.jitsi:9001

# Set etherpad-lite public URL, including /p/ pad path fragment (uncomment to enable)
#ETHERPAD_PUBLIC_URL=https://etherpad.my.domain/p/

# Name your etherpad instance!
ETHERPAD_TITLE=Video Chat

# The default text of a pad
ETHERPAD_DEFAULT_PAD_TEXT="Welcome to Web Chat!\n\n"

# Name of the skin for etherpad
ETHERPAD_SKIN_NAME=colibris

# Skin variants for etherpad
ETHERPAD_SKIN_VARIANTS="super-light-toolbar super-light-editor light-background full-width-editor"


#
# Basic Jigasi configuration options (needed for SIP gateway support)
#

# SIP URI for incoming / outgoing calls
#JIGASI_SIP_URI=test@sip2sip.info

# Password for the specified SIP account as a clear text
#JIGASI_SIP_PASSWORD=passw0rd

# SIP server (use the SIP account domain if in doubt)
#JIGASI_SIP_SERVER=sip2sip.info

# SIP server port
#JIGASI_SIP_PORT=5060

# SIP server transport
#JIGASI_SIP_TRANSPORT=UDP


#
# Authentication configuration (see handbook for details)
#

# Enable authentication
#ENABLE_AUTH=1

# Enable guest access
#ENABLE_GUESTS=1

# Select authentication type: internal, jwt, ldap or matrix
#AUTH_TYPE=internal

# JWT authentication
#

# Application identifier
#JWT_APP_ID=my_jitsi_app_id

# Application secret known only to your token generator
#JWT_APP_SECRET=my_jitsi_app_secret

# (Optional) Set asap_accepted_issuers as a comma separated list
#JWT_ACCEPTED_ISSUERS=my_web_client,my_app_client

# (Optional) Set asap_accepted_audiences as a comma separated list
#JWT_ACCEPTED_AUDIENCES=my_server1,my_server2

# LDAP authentication (for more information see the Cyrus SASL saslauthd.conf man page)
#

# LDAP url for connection
#LDAP_URL=ldaps://ldap.domain.com/

# LDAP base DN. Can be empty
#LDAP_BASE=DC=example,DC=domain,DC=com

# LDAP user DN. Do not specify this parameter for the anonymous bind
#LDAP_BINDDN=CN=binduser,OU=users,DC=example,DC=domain,DC=com

# LDAP user password. Do not specify this parameter for the anonymous bind
#LDAP_BINDPW=LdapUserPassw0rd

# LDAP filter. Tokens example:
# %1-9 - if the input key is user@mail.domain.com, then %1 is com, %2 is domain and %3 is mail
# %s - %s is replaced by the complete service string
# %r - %r is replaced by the complete realm string
#LDAP_FILTER=(sAMAccountName=%u)

# LDAP authentication method
#LDAP_AUTH_METHOD=bind

# LDAP version
#LDAP_VERSION=3

# LDAP TLS using
#LDAP_USE_TLS=1

# List of SSL/TLS ciphers to allow
#LDAP_TLS_CIPHERS=SECURE256:SECURE128:!AES-128-CBC:!ARCFOUR-128:!CAMELLIA-128-CBC:!3DES-CBC:!CAMELLIA-128-CBC

# Require and verify server certificate
#LDAP_TLS_CHECK_PEER=1

# Path to CA cert file. Used when server certificate verify is enabled
#LDAP_TLS_CACERT_FILE=/etc/ssl/certs/ca-certificates.crt

# Path to CA certs directory. Used when server certificate verify is enabled
#LDAP_TLS_CACERT_DIR=/etc/ssl/certs

# Wether to use starttls, implies LDAPv3 and requires ldap:// instead of ldaps://
# LDAP_START_TLS=1


#
# Security
#
# Set these to strong passwords to avoid intruders from impersonating a service account
# The service(s) won't start unless these are specified
# Running ./gen-passwords.sh will update .env with strong passwords
# You may skip the Jigasi and Jibri passwords if you are not using those
# DO NOT reuse passwords
#

# XMPP password for Jicofo client connections
JICOFO_AUTH_PASSWORD=e214d45ce22fa55399d390821df5640d

# XMPP password for JVB client connections
JVB_AUTH_PASSWORD=73f9cbee1411d411965546fb1373c7b1

# XMPP password for Jigasi MUC client connections
JIGASI_XMPP_PASSWORD=3a1ad7cd4a21aa0162fc2b5f1f69cb4d

# XMPP recorder password for Jibri client connections
JIBRI_RECORDER_PASSWORD=adca62e0038520f049580e7449880d25

# XMPP password for Jibri client connections
JIBRI_XMPP_PASSWORD=06a7077f8e269d6ccbc4f97a8604cec4

#
# Docker Compose options
#

# Container restart policy
#RESTART_POLICY=unless-stopped

# Jitsi image version (useful for local development)
#JITSI_IMAGE_VERSION=latest


Beitrag automatisch zusammengeführt:

Code:
docker ps
CONTAINER ID   IMAGE                           COMMAND        CREATED          STATUS          PORTS                                                                            NAMES
3efdeb0a8ad9   jitsi/jvb:stable-8319           "/init"        10 minutes ago   Up 10 minutes   127.0.0.1:8080->8080/tcp, 0.0.0.0:10000->10000/udp, :::10000->10000/udp          docker-jitsi-meet-stable-8319_jvb_1
d0667f0886bb   jitsi/prosody:stable-8319       "/init"        10 minutes ago   Up 10 minutes   5222/tcp, 5280/tcp, 5347/tcp                                                     docker-jitsi-meet-stable-8319_prosody_1
01a9d5d4181a   jitsi/web:stable-8319           "/init"        10 minutes ago   Up 10 minutes   0.0.0.0:8000->80/tcp, :::8000->80/tcp, 0.0.0.0:8443->443/tcp, :::8443->443/tcp   docker-jitsi-meet-stable-8319_web_1
e222e69631e5   jitsi/jicofo:stable-8319        "/init"        15 minutes ago   Up 15 minutes                                                                                    docker-jitsi-meet-stable-8319_jicofo_1
f361a8da2a3f   portainer/portainer-ce:latest   "/portainer"   10 hours ago     Up 2 hours      8000/tcp, 9443/tcp, 0.0.0.0:9000->9000/tcp, :::9000->9000/tcp                    portainer
Portcheck
Code:
docker container port 01a9d5d4181a
80/tcp -> 0.0.0.0:8000
80/tcp -> [::]:8000
443/tcp -> 0.0.0.0:8443
443/tcp -> [::]:8443

Jitsi ist auch über http://192.168.178.136:8000/ erreichbar.


Was muss ich anpassen, damit Jitsi über die http://192.168.178.136 erreichbar ist?

Gebe ich http://192.168.178.136 ein werde ich zu https://192.168.178.136:8443/ umgeleitet.

Ich möchte aber auf http://192.168.178.136:8000/ umgeleitet werden.

Wie geht das?
Beitrag automatisch zusammengeführt:

weiterer Hinweis

Um auf http://192.168.178.136:8000/ zugrreifen zu können, muss einmal https://192.168.178.136:8443/ aufgerufen worden sein, ansonsten wird die Verbindung abgebrochen.
Beitrag automatisch zusammengeführt:

Lösungsansatz https://community.jitsi.org/t/install-jitsi-meet-for-a-local-network/16375

Hinweis von User
Ich habe tatsächlich einen eigenen jitsi-Server für family & friends, der ist jedoch mit https,zertifikaten und Co im Netz.

Ich würde das ganze nicht als docker Container aufsetzen sondern alles von Grund auf, dann musst du nix mit https und zertifikaten regeln.
Allerdings setzt das doch recht profunde Linuxkenntnisse voraus, auch ein langes auseinandersetzen mit dem Thema ist unabdingbar. Du musst hierfür genau wissen was Du tust.
Jitsi von "alles von Grund auf" läuft bei mir, schon getestet.
"auch ein langes auseinandersetzen mit dem Thema ist unabdingbar" da bin ich gerade dabei.
Beitrag automatisch zusammengeführt:

Jitsi ohne App unter iOS und auch Android meiner Erfahrung nach auch nichtb
So schlecht finde ich das nicht, mit Android kann man sogar zoomen und responsive Design ist auch vorhanden.
Natürlich gibt es bessere Lösungen.
 
Zuletzt bearbeitet:
Evtl. in der .env auf Port 80 ändern? Dann im Docker ändern. 80/tcp -> 0.0.0.0:80
 
Nur mal so ne Idee, kann man nicht im Router ne static Route per Domain Name vergeben?
Also sowas wie <server>.fritz.box als redir auf den gewünschten Port?
 
  • ok1.de
  • ok2.de
  • thinkstore24.de
  • Preiswerte-IT - Gebrauchte Lenovo Notebooks kaufen

Werbung

Zurück
Oben